A Step-By-Step Guide to Cleaning the EGR Cooler on a Volvo D13 Engine
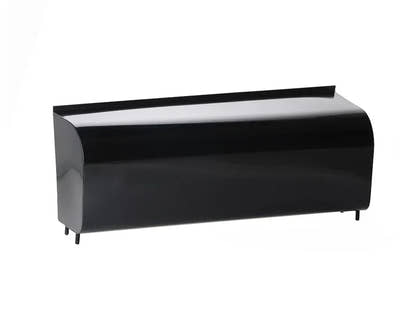
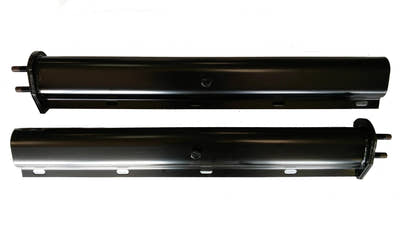
Maintaining the EGR (exhaust gas recirculation) cooler on your Volvo D13 engine is crucial for keeping it running smoothly and efficiently. The EGR cooler helps reduce emissions by recirculating a portion of the exhaust gases back into the engine, but over time it can become clogged with soot and debris, leading to reduced performance and efficiency. The EGR cooler is typically located on the right side of the engine underneath the turbocharger and near the EGR valve (obviously), it's a long rectangular cube shape (without getting technical) with 2 round flanges on both ends. In this article, we'll go over the steps on how to clean the EGR cooler and get your engine running at its best.
If you are not sure if you need to clean your EGR cooler or not, or maybe even replace it, check out our blog article on 7 Symptoms of a Failing EGR Cooler on your Volvo D13 Engine
Steps for Cleaning the EGR Cooler:
1. Gather the necessary tools and supplies:
- To clean the EGR cooler, you'll need a few tools, including a wrench set, a screwdriver set, a coolant draining container (capable of holding up to 14 gallons), and a heavy duty degreaser (1-2 gallons).
2. Disconnect the battery:
- Before starting any work on the engine, it's important to disconnect the battery to prevent any electrical accidents.
3. Drain the coolant:
- The first step in cleaning the EGR cooler is to drain the coolant from the engine. Locate the coolant drain valve and use a wrench to open it. Allow the coolant to drain completely into the coolant draining container.
4. Remove the EGR cooler:
- First, remove the mounting bolts that hold the EGR cooler in place.
- Next, remove the clamps connecting the EGR cooler to the EGR valve or elbow.
- Carefully remove the EGR cooler from the engine, and be sure to remove the outlet EGR hose and the inlet and outlet coolant lines.
5. Clean the EGR cooler:
- Seal the outlet exhaust end of the EGR cooler with a cap, or a DIY plug, or wrap the end with heavy duty plastic wrap and seal it with a clamp.
- Fill the inlet exhaust end (EGR valve side) of the EGR cooler with the degreaser to the brim. Let it sit for 8-12 hours. Note: This step is a matter of personal preference and depends on the strength of the degreaser. If the degreaser is very strong, it may be safer to simply rinse the EGR cooler instead of letting it soak.
- Drain the used degreaser into a proper container and dispose of it properly.
- Rinse the degreaser out of the EGR cooler so there is no residue left. This is important because any residue can cause the soot to build up even more.
- Make sure the EGR cooler is thoroughly dry before reassembly to prevent water from entering the exhaust system.
6. Test the EGR cooler:
- Once the EGR cooler is clean, you can test it to make sure it is functioning properly. One way to do this is to perform a backpressure test. This involves using a pressure gauge to measure the amount of pressure exerted on the EGR cooler (if you have access to such tools).
7. Reinstall the EGR cooler:
- Once the EGR cooler has been cleaned and tested, you can reinstall it on the engine. Be sure to replace any necessary gaskets, seals, hoses, or clamps that are worn or damaged. Tighten the mounting bolts securely and refill the engine with coolant.
8. Test the engine:
- After the EGR cooler has been reinstalled, start the engine and test it to make sure it is running smoothly. If the engine is running correctly, you can consider the cleaning process a success.
Conclusion:
Cleaning the EGR cooler on your Volvo D13 engine is an important maintenance task that can help improve performance and efficiency. By following the steps outlined above, you can effectively clean the EGR cooler and get your engine running at its best. Remember to always use caution when working on the engine and to follow all safety guidelines.
Check out our Volvo D13 EGR cooler related parts to help complete this job:
- EGR Elbow Pipe Gasket | Volvo D13 / Mack MP8 | Volvo 20841816 | FleetRun FR-ENGN316
- V-Band Clamp | Volvo / Mack | Volvo 20755169 / 20855725 / 20559348 | FleetRun FR-EXST434
- EGR Cooler Coolant Connection Pipe | Volvo / Mack | Volvo 21434720 / 21328254 | FleetRun FR-COOL774
- EGR Hose Kit | Volvo D13 / Mack MP8 | Volvo 85124530 / 21431012 | FleetRun FR-ENGN431
Disclaimer:
Please note that the information provided in this article is for informational purposes only and is not intended as a substitute for professional advice or services from a heavy duty semi truck repair shop. The methods described here are not recommended or endorsed by any professional mechanic. This is for the DIY trucker that wants to save a few dollars and maybe learn a thing or 2. Performing these tasks on your own carries inherent risks, and you should always use caution and follow all safety guidelines when working on your vehicle. By following the steps outlined in this article, you do so at your own risk.